Basic Import and Export Workflow with eMAM & Adobe Premiere Pro
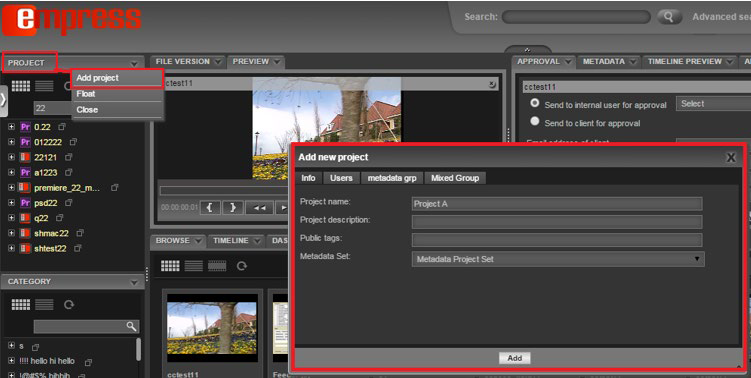
- In the eMAM Director Interface, create a new Project to manage media going to Premiere Pro. Add files which need editing in Adobe Premiere Pro.
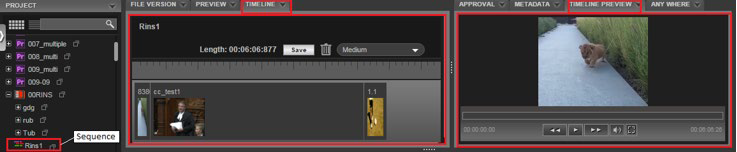
- Create a new sequence for Rough Cuts. Drag the assets and sub-clip media you want in your timeline into the Timeline Widget and Click “Save”. To preview this timeline, you can open the “Timeline Preview” widget.
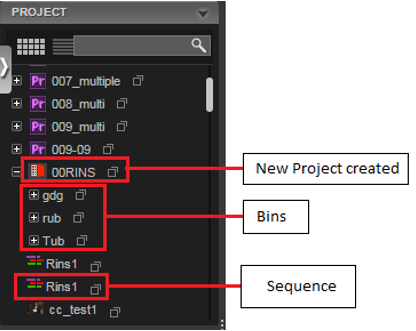
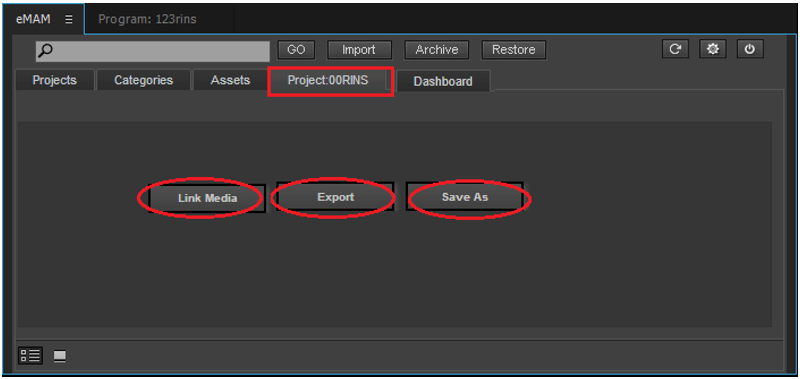
- Project is now ready to be imported into Adobe Premiere Pro.
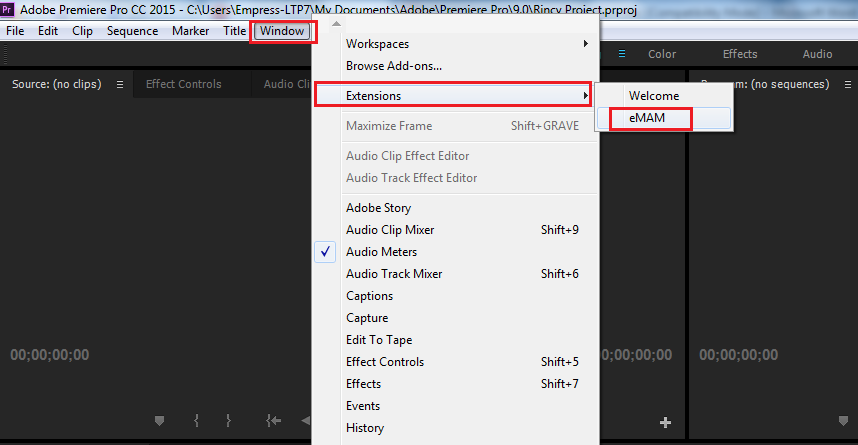
- Launch Adobe Premiere Pro. Open the eMAM Panel in Adobe Premiere by clicking Windows>Extensions>eMAM.
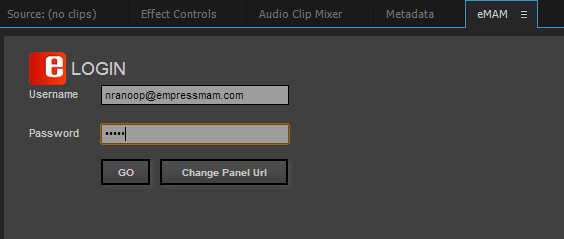
- Login using the eMAM login credentials.
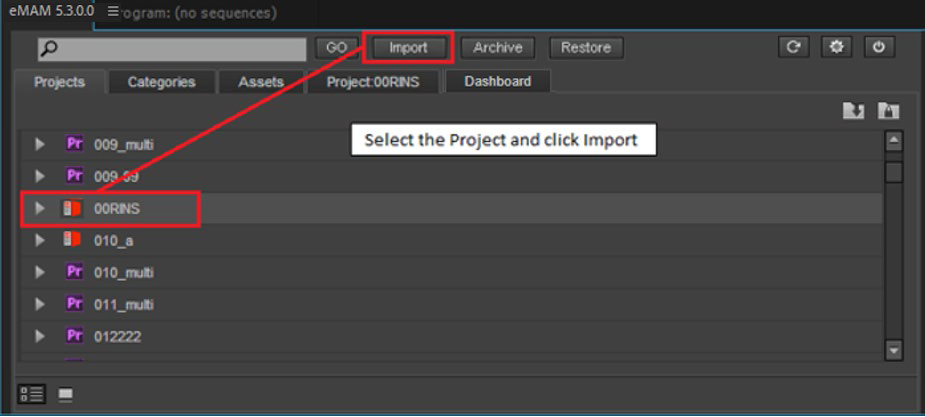
- From the Projects Tab, select the eMAM project created in eMAM and Click “Import”.
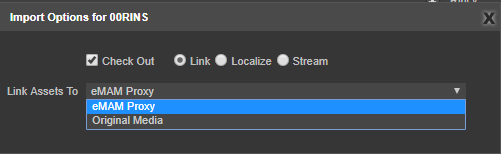
- The Import Options window pops-up. Make sure the location of the Premiere project is correct and select Link to assets “Original Media”. The Checkout option will be automatically selected.
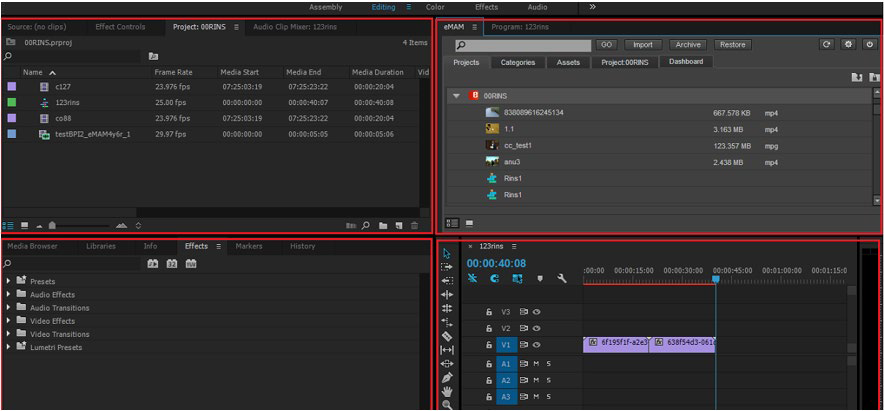
- Begin your edits and if required, add more assets from external drives or from the eMAM Panel (Categories and Single Assets),
- When the editing is complete, and the Sequence is “Ready for Review”, save the project, then click on “Export” to send all edit references back to eMAM.
- Each time a same project is exported back to eMAM, you will be asked to add version notes.
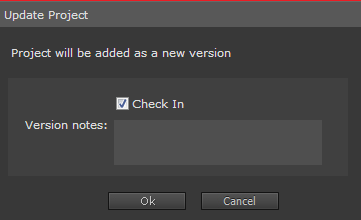
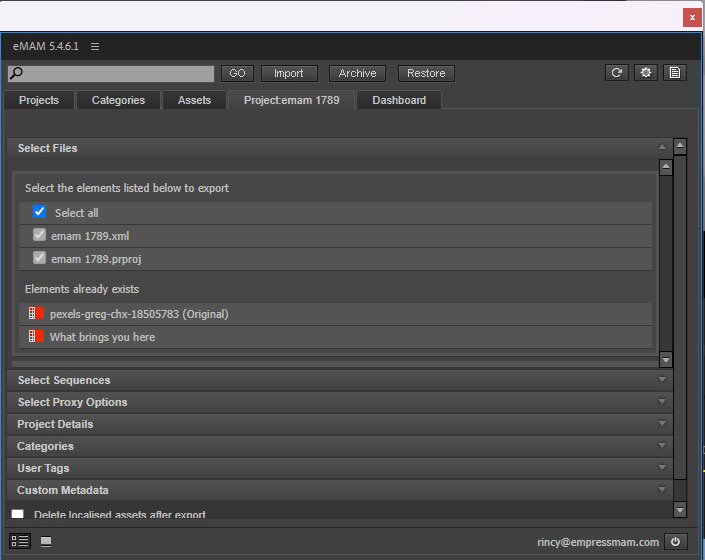
- Fill in Project Metadata details for the new version. During export, eMAM will make proxy versions for preview for all the new local assets and all the sequences. Project is now added as a new version of the same project and sequence is also added as a new version of the sequence. An XML file is now exported as part of project version when files are exported from Premiere to eMAM. This xml file will have all the details of the assets and sequences included in this project which can be used in other NLE systems. This xml file can be downloaded or shared through eBIN.
- Within the eMAM Director Interface, the new Premiere project will appear in the “Projects” widget window. You can open the “Project Versions” Widget in your workspace to see both the eMAM and Premiere project versions.

Related Articles
Bug Fixes eMAM 5.4
Bug Fixes in eMAM 5.4 BUG ID DESCRIPTION 5.3.1_18NOV2021 11889 Storage DNA API change to handle "404 not found" in the response. 11899 Schedule metadata is not getting updated for PATCH api/v1/assets/{AssetId}/AssetMetadata 11708 PFR is not working ...
Release Notes eMAM version 5.5
EMAM, Inc. is excited to announce the release of eMAM version 5.5! This new release includes several key features and enhancements to help you manage your media assets more efficiently than ever before. In addition to the key features, eMAM version ...
Released eMAM Version 5.3 (Oct 2021)
EMAM, Inc. is delighted to roll out its latest eMAM version 5.3 enriched with some exciting new additions like eFeeder, packaged asset delivery using ATEME TITAN, stitch & deliver using Elemental MediaConvert, instant asset, improved editing tools ...
Released eMAM Version 5.5 (April 2024)
EMAM, Inc. is excited to announce the release of eMAM version 5.5! This new release includes several new integrations, key features and enhancements to help you manage your media assets more efficiently than ever before. In addition to the key ...
How to re-export the stuck project from Adobe Premiere Pro?
This KB article mainly describes the changes made across the panel workflow as part of the eMAM 5.4 version. Major changes include the panel code being moved to the server side so that any changes on the panel side that are needed, can be achieved ...